PhpStorm + Xdebugでリモートデバッグする方法
.NETをVisual Studioで書いていた人間がPhpStormデビューした時、無性に「あれ」がやりたくなりました。
ブレークポイント張ってポチポチ一行ずつ進めるデバッグです。ステップ実行です。
実際にやってみると手順も多くあちらこちら設定する必要があったのでまとめてみました!
環境
- PhpStorm 2017.2
- PHP 7.1.10
- Laravel 5.5
- ローカル macOS Sierra 10.12.6
- リモートはHomestead
- Ubuntu 16.04.3 LTS
- nginx/1.13.3
ローカル環境を設定する
PHPバージョンをリモートと合わせる
macにもともと入っているPHPのバージョンが古かったので、念のためanyenvを使ってバージョンを合わせました。
Xdebugインストール
homebrewでインストールしました。
brew install php71-xdebug
リモート環境を設定する
Xdebugの設定
HomesteadなのでXdebugはもともと入っていました。
なので、設定のみ。以下のようにしました。
ここの内容は後ほどPhpStormの設定をする際必要です。
$ sudo vim /etc/php/7.1/mods-available/xdebug.ini

zend_extension=xdebug.so
xdebug.remote_enable = 1
xdebug.remote_connect_back = 1
xdebug.remote_port = 9001
xdebug.max_nesting_level = 512
xdebug.idekey = "PHPSTORM"
からのphp再起動。
$ cd /etc/init.d
$ sudo service php7.1-fpm restart
PhpStormを設定する
デバッグしたいプロジェクトを開いた状態で設定を進めます。
※メニュー日本語化してます
preferenceから
- Languages & Frameworks - php
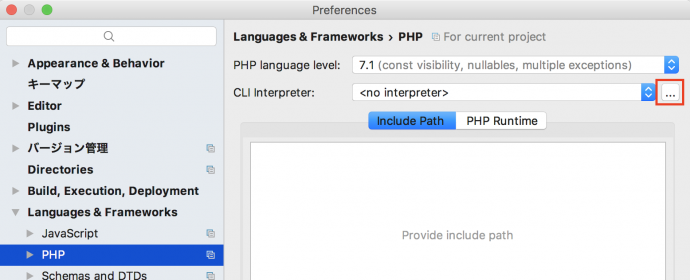
PHP language levelとCLI Interpreterを設定します。
PHP language levelはバージョンを選べばいいだけ。
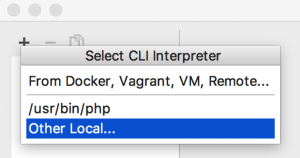
CLI Interpreterは横についてるボタンで画面を起動して、+ボタンからOther Localを選択し項目を追加。
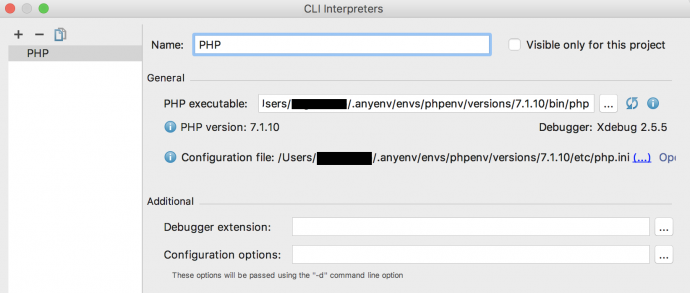
PHP executableにphpファイルを指定します。
※私の場合anyenvの下の方にあるphpを指定しました
※anyenvどこやねんと思われた方は横のボタンをクリック後、Shift+command+Gの「フォルダへ移動」で「~/.anyenv」と入力すると移動できます。
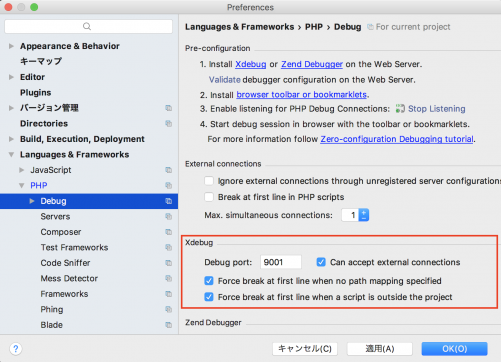
- Languages & Frameworks - php - Debug
Xdebugのportを設定します。
リモート側xdebug.iniのxdebug.remote_portと同じ値を設定をします。
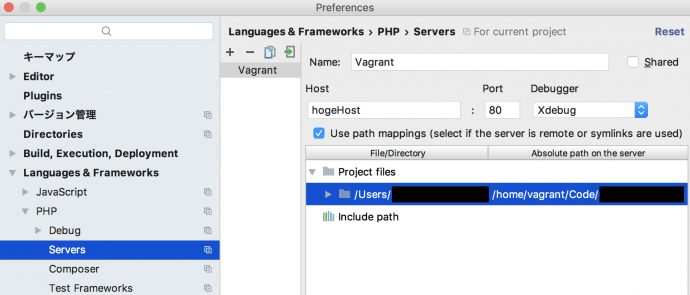
- Languages & Frameworks - php - Servers
リモートサーバーを追加します。
+ボタンで項目を追加します。
Nameは任意の名前でOK、Hostにリモートサーバのホスト名、ここのPortは80のままで問題無しでした。
Use path mappingsにチェックを入れパスの紐付けをします。
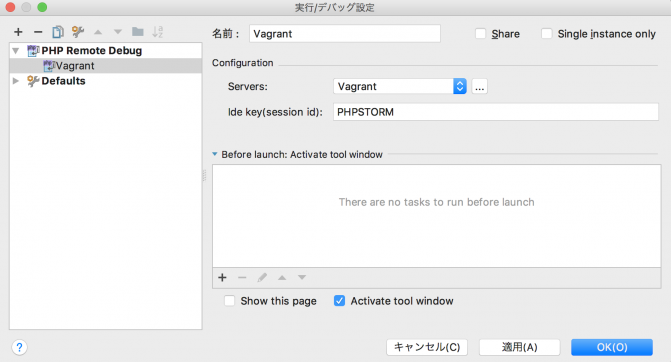
実行メニューから
- 設定の編集
+ボタンからPHP Remote Debugを追加
名前は任意でOK、Serversは追加したリモートサーバーを指定します。
ide keyはリモート側Xdebug.iniのxdebug.idekeyと同じ値を設定します。
いざステップ実行!
メイン画面の右上あたりにPHP Remote Debugで追加した名前が表示されていることを確認したら、
てんとう虫のアイコンをクリックします。

さらに電話と虫のアイコンがアクティブになっていることを確認します。
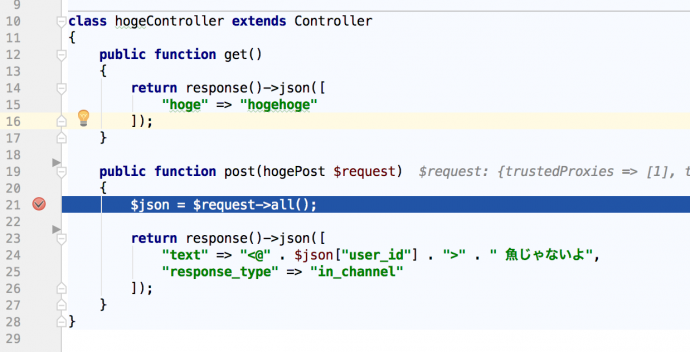
エディタの行番号横あたりをクリックしてブレークポイントを張ったらあとは実行するのみ!
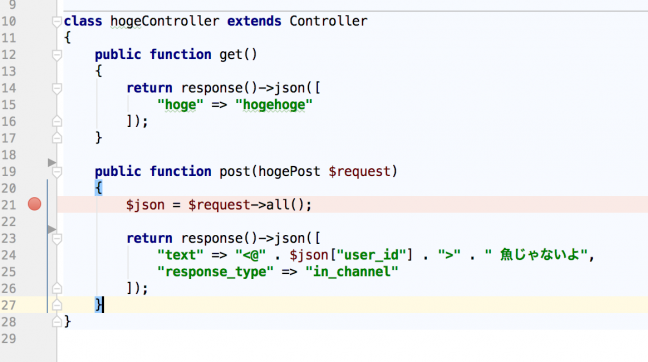
テスト用のAPIを叩いてみましょう。
URLに?XDEBUG_SESSION_START=PHPSTORMを追加した状態で実行!
止まりました。あとはポチポチと進めていくのみ!